LH PICO MMU
What is it
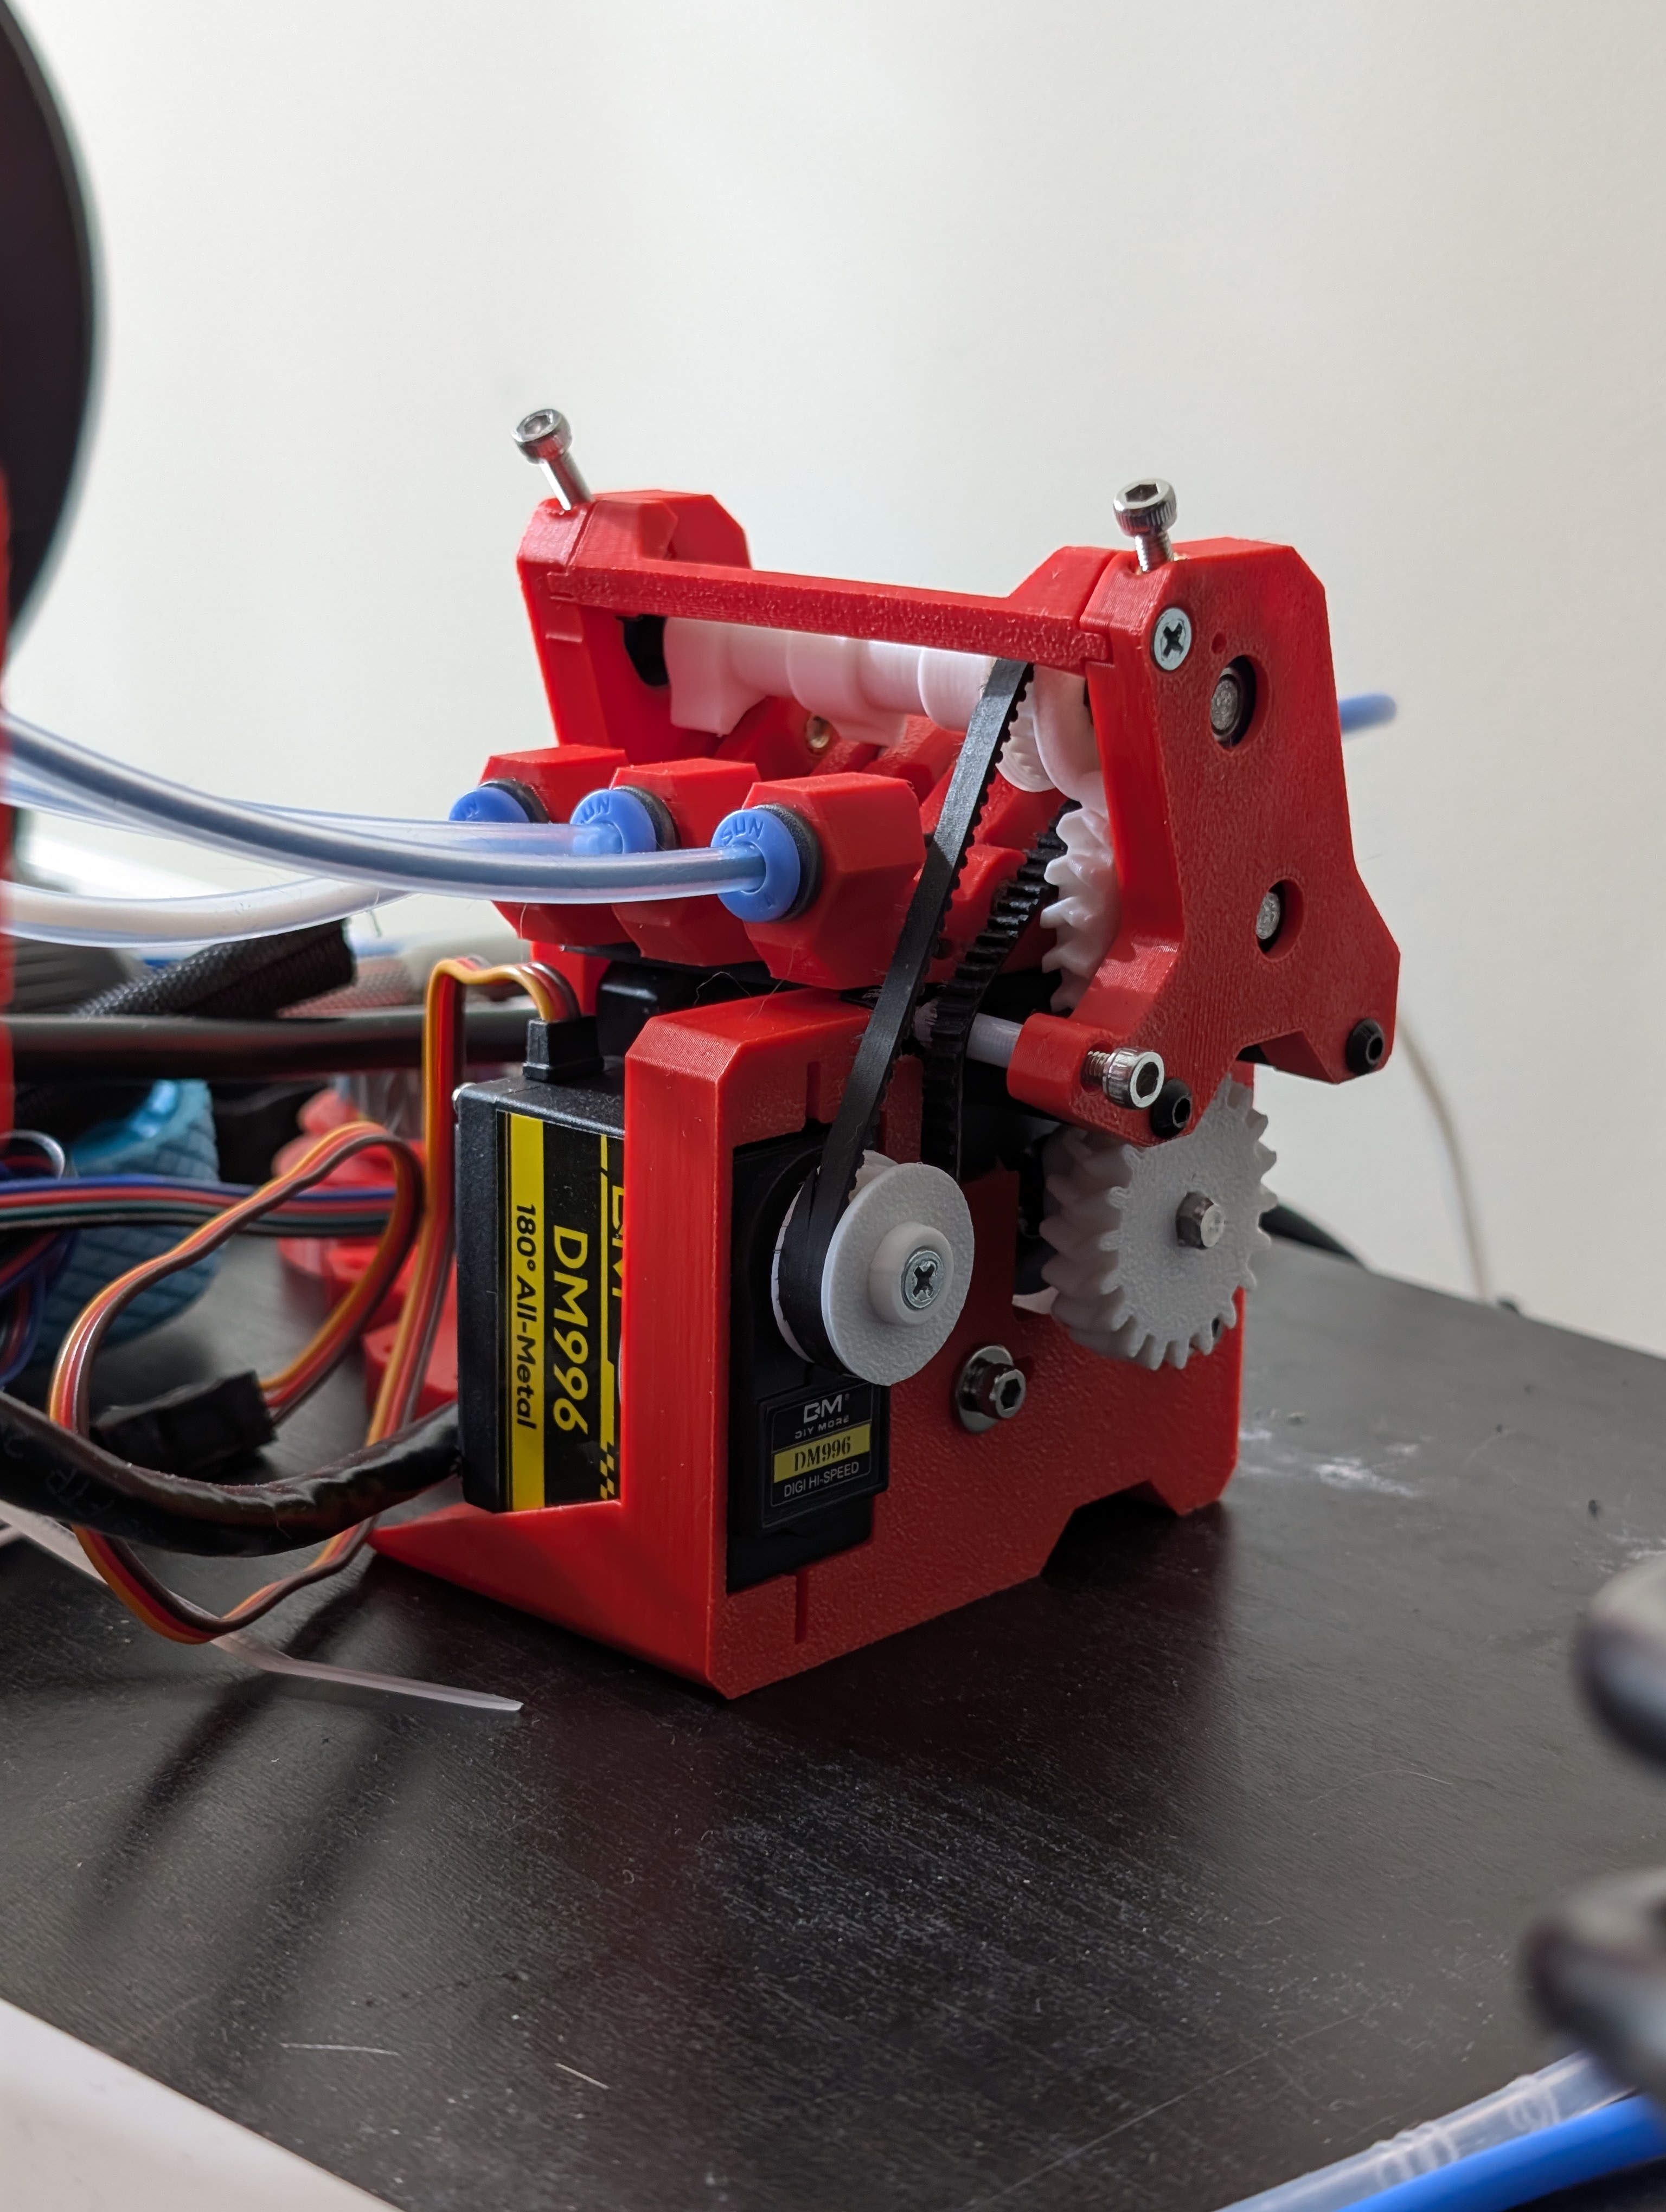
The Pico MMU is a very cost effective and compact multi material system.
How does it work?
It uses a common power shaft that attaches to the stepper motor, all the filament rests on this. To activate a lane/filament the servo will spin the camshaft to a set angle where an arm with a bearing inside can push the filament into the power shaft. This esentally is now working as a single gear extruder, this is how filament is loaded and unloaded. The pico does not use its stepper motor to help the main extruder, the pico's stepper motor is only used for filament changes and while the printer is doing a print it is doing nothing and the camshaft is in neutral.
What printers are supported
any printer running klipper, that you can add a toolhead filament sensor too (or has one stock). You also need to have a way to control the pico which requires a stepper motor driver and a way to control the servo motor. Many people use EBB42 boards for this as it fits nicely onto the back of the pico. The only important factors when considering how you are going to control your pico is servo motor current, specifically because if you go off spec with the servo motor you are very likly to burn out the 1amp 5v rail found on the EBB series of boards
What do I need to get started
- a stepper motor, a servo motor, some bearings, d-shaft and a 3dprinter
BOM
| Item | Quantity |
|---|---|
| EMAX ES3004 Servo (EMAX) | 1 |
| Nema 17 (max 40mm length) | 1 |
| Steel D-Shaft 5mm x 72mm or 90m for 4 lanes | 2 |
| Bearing MR115 | 4 |
| Bearing MR83 | 3 (4)* |
| BMG Drive Gear (with grub screw) | 3 (4)* |
| PTFE Tube 4mm OD, 3mm ID | 1 |
| ECAS 4 Collet | 6 (8)* |
| Belt GT2 ~20cm | 1 (Belt Drive)** |
| Heat Insert M3 5mm (D) x 4mm (L) | 20 (23)* |
| Screw Cap Head M3 10mm | 3 |
| Screw Cap Head M3 22mm | 2 |
| Screw Cap Head M3 30mm | 2 |
| Screw Cap Head M3 8mm | 2 |
| Screw Countersunk M3 10mm | 12 |
| Screw Countersunk M3 16mm | 4 |
| Screw Countersunk M3 8mm | 1 |
| Screw Grub M3 6mm (optional) | 2 |
Printed parts
The printed parts can be found on the offical github, it is only 4 plates of parts on a 225mm^2 bed, you can make it more compact if you would like, the parts can be printed in whatever material you'd like, I have used PLA+ for all of mine
The offical print files can be found on github: Print files
Assembly/build
At the time of writing this there is no offical assembly guide with the cad files being the only guidance.